15+ Ideas to Refresh My Living Room for Everyday Comfort
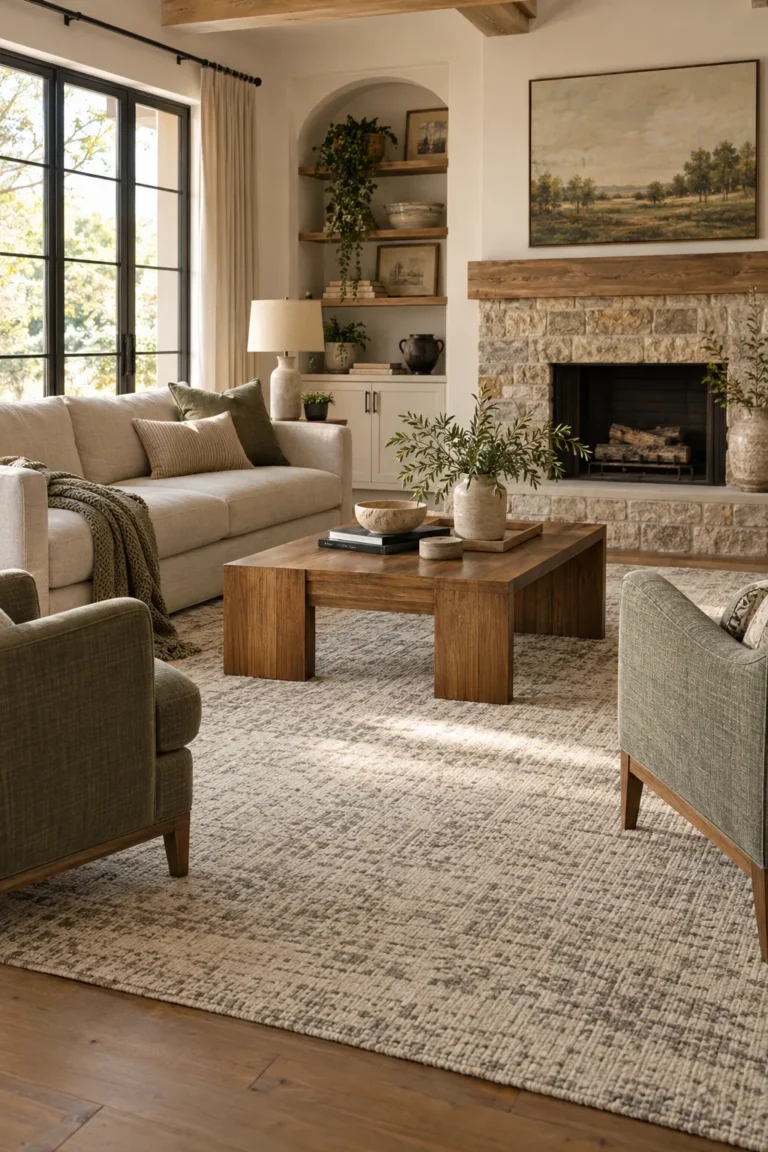
"How do I refresh my living room without weeks of renovation?" Start with small styling shifts; they make a noticeable impact. These practical ideas suit renters and homeowners who want a fresh, welcoming space using everyday decor. You do not need to replace every piece of furniture to enjoy a calm, put-together lounge that feels inviting for family and guests.
We organized this collection starting with simple afternoon tweaks that cost very little, followed by gradual layout adjustments and impactful cosmetic projects. Work through the list at your own pace to find solutions for tired sofas, dim corners, and bare walls. Choose one simple project today to create a living space you genuinely love spending time in.
Jump to an idea
- Swap throw pillow covers for texture
- Angle furniture toward natural light
- Restyle coffee tables using shallow trays
- Introduce a tall leafy floor plant
- Drape a textured waffle throw blanket
- Arrange pillar candles on stone
- Mount an oversized round wall mirror
- Set up layered warm accent lighting
- Hang an asymmetric framed art display
- Upgrade media console drawer hardware
- Lay down a large textured rug
- Hang floor-to-ceiling linen curtain panels
- Paint an accent wall in sage
- Install floating shelves above seating
- Paint trim in a contrasting tone
1. Swap throw pillow covers for texture
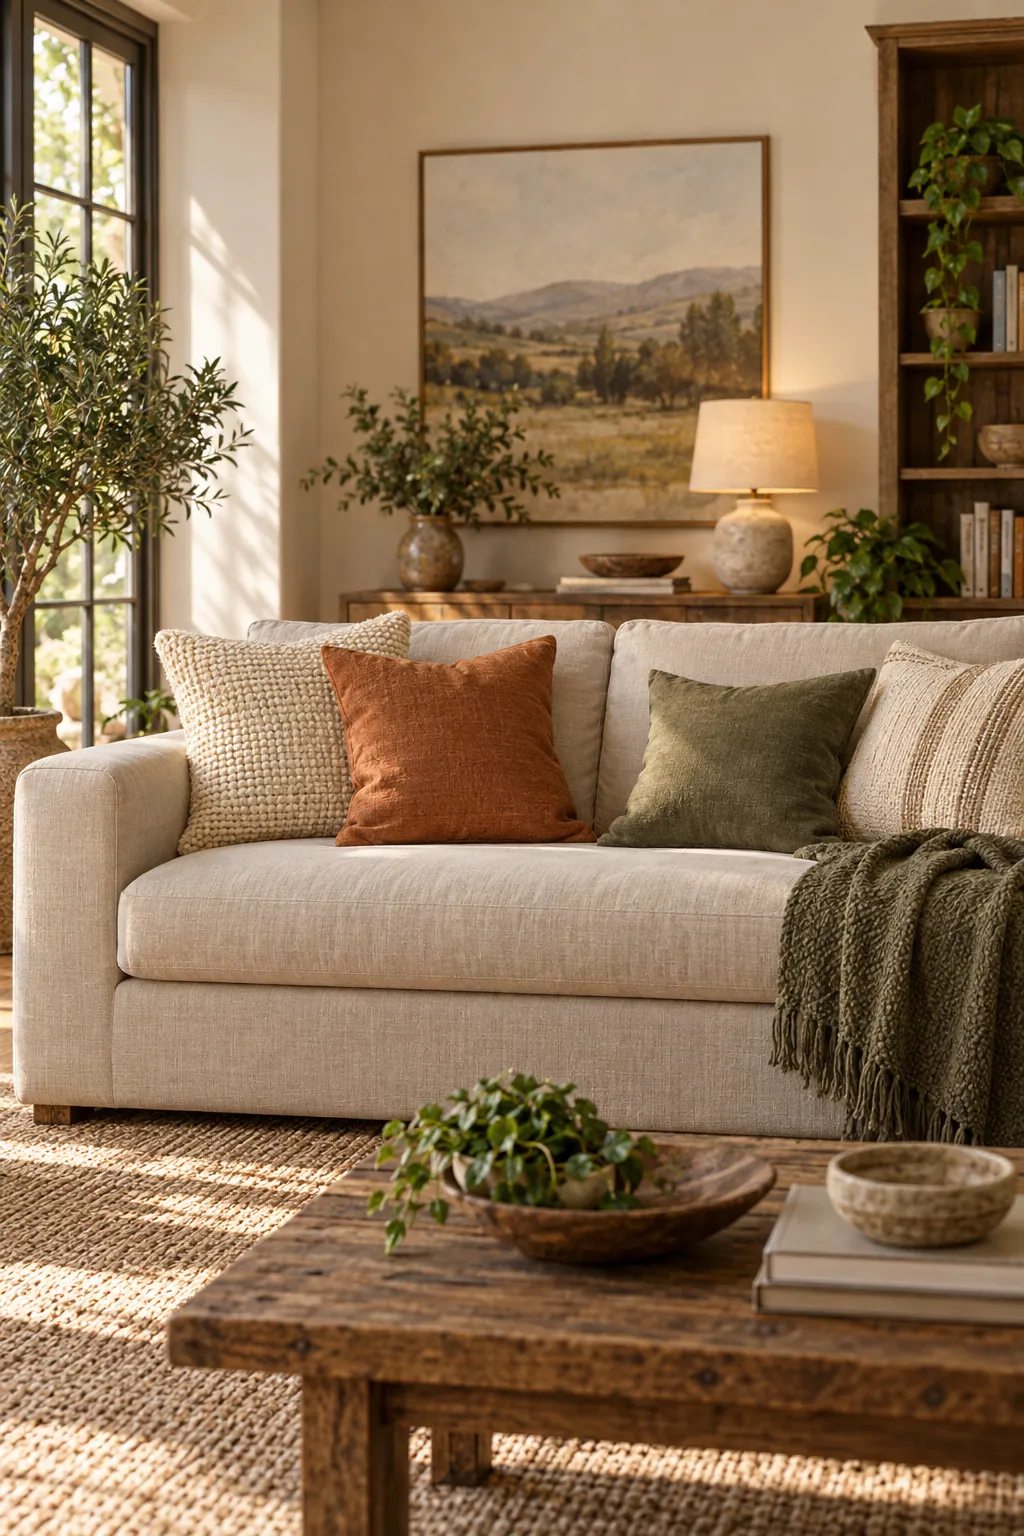
Swapping out tired cushion covers brings immediate variety without the cost of buying brand-new inserts. Mixing tactile fabrics like chunky bouclé, washed linen, and ribbed corduroy creates visual depth across plain upholstery. Select covers that match your existing cushion sizes snugly to maintain a plump, structured shape through everyday family use.
Get the look
- Woven bouclé pillow covers
- Washed linen square covers
- Feather-down cushion inserts
- Ribbed corduroy pillow covers
How to style it
- Remove old decorative covers and fluff the existing cushion inserts thoroughly.
- Slip on new textured covers in two or three coordinating earthy tones.
- Arrange the largest pillows against the sofa arms and layer smaller ones in front.
2. Angle furniture toward natural light
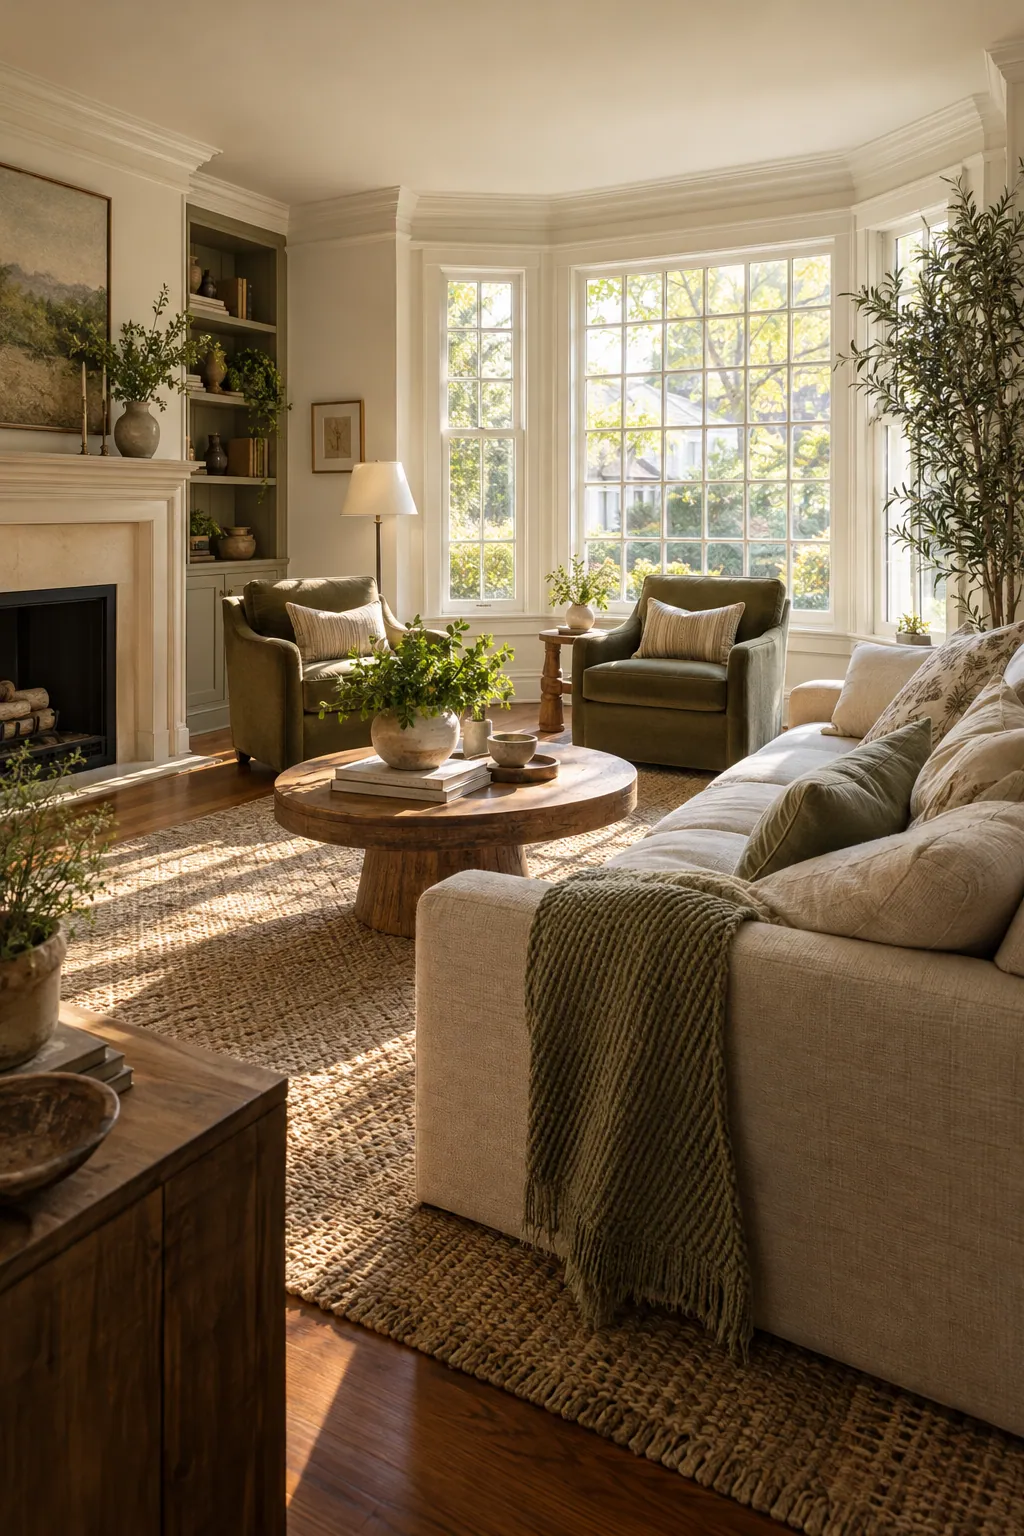
Shifting your primary seating toward the largest window maximizes natural daylight and changes how the room flows. Breaking away from straight wall-aligned layouts creates a cozy conversational circle that feels deliberate and open. Leave at least three feet of walking room behind chairs so foot traffic moves freely through the area.
Get the look
- Felt furniture floor pads
- Low wood coffee table
- Two neutral accent armchairs
How to style it
- Pull the sofa away from exterior walls toward the center of the room.
- Angle companion chairs inward to form a conversational semi-circle facing the window.
- Check that main walkways remain unobstructed by walking behind the newly placed seating.
3. Restyle coffee tables using shallow trays
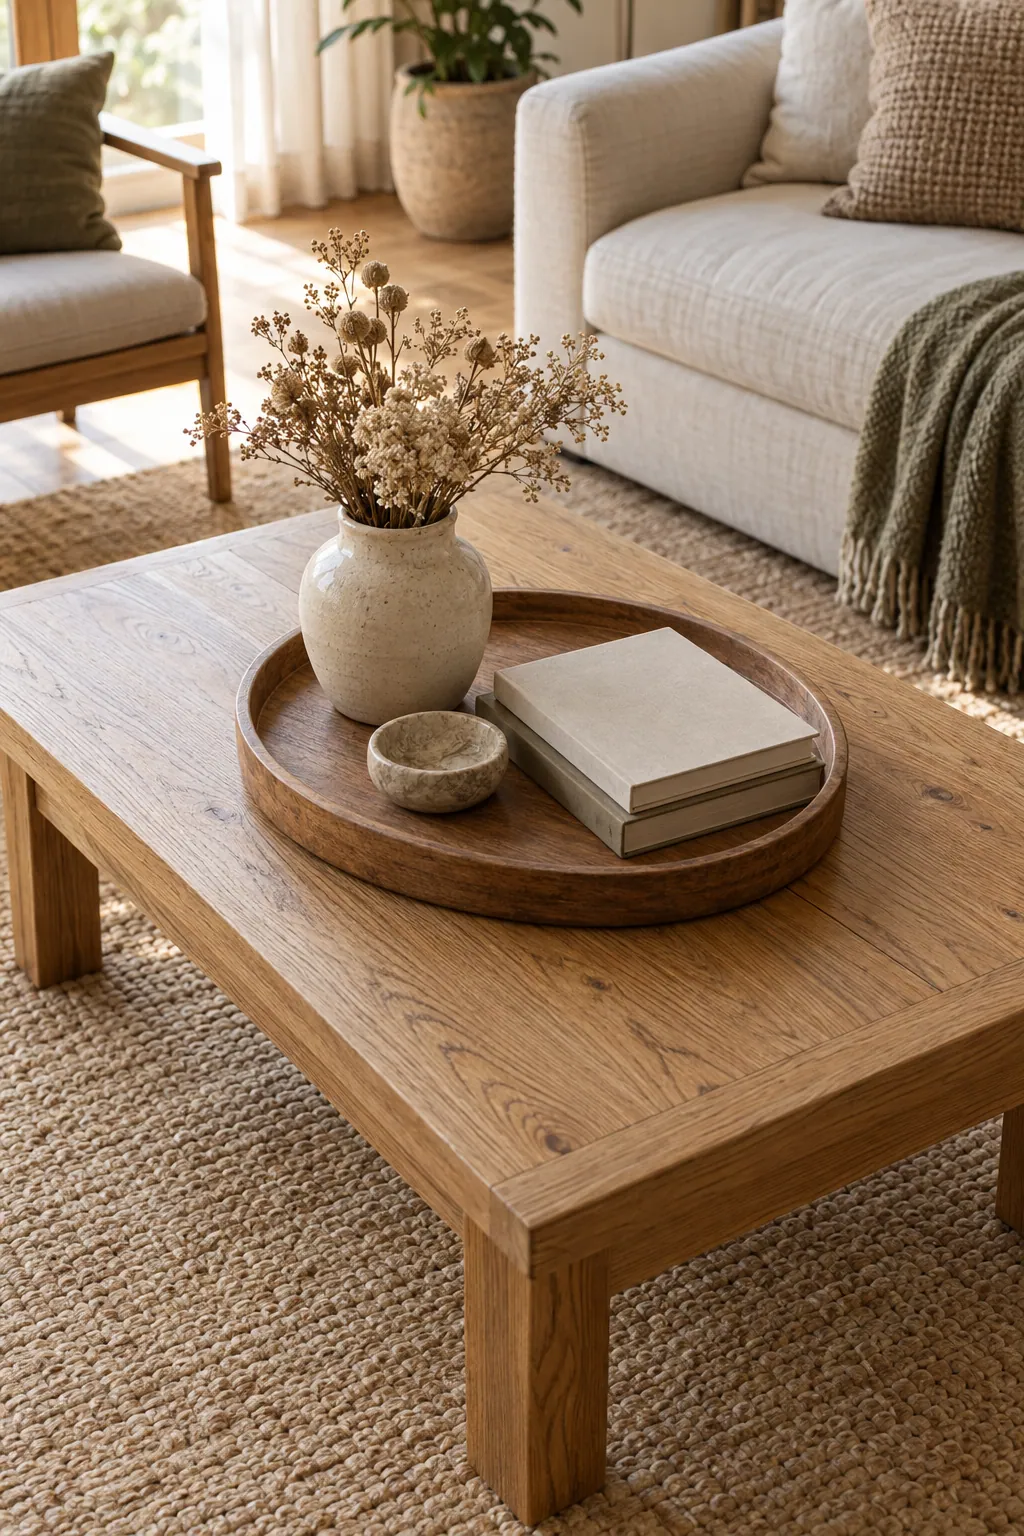
Cluttered surfaces weigh down a seating area faster than almost anything else. Using a dedicated tray corrals everyday items while providing a neat base for decorative objects of varying heights. Keep television remotes inside a small woven box beside a simple vase to combine daily function with calm visual order.
Get the look
- Shallow round wooden tray
- Small ceramic bud vase
- Lidded woven storage box
- Hardcover design books
How to style it
- Clear every object off the coffee table surface and wipe it completely clean.
- Position a wide wooden or woven tray off-center on the tabletop.
- Group a tall vase, a short stack of books, and a covered box inside the tray perimeter.
4. Introduce a tall leafy floor plant
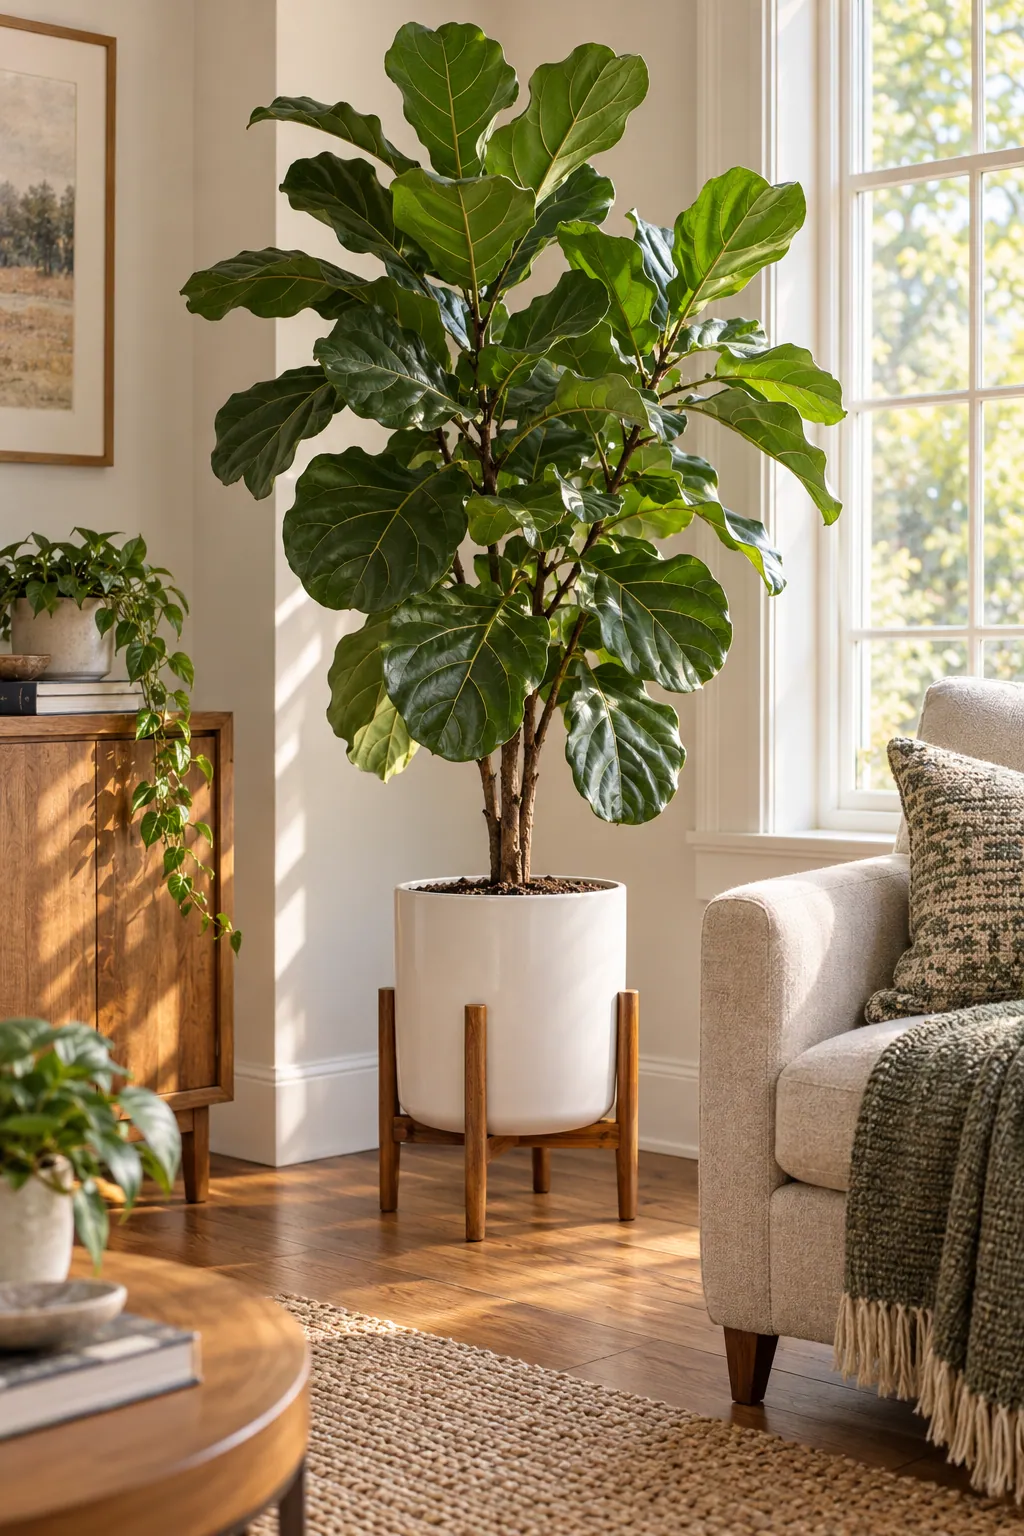
Bringing foliage indoors adds vibrant organic color and softens rigid furniture corners. A tall floor plant draws the eye upward, making standard ceilings feel higher without occupying valuable floor space. Choose a species suited to your light levels, and place a protective saucer beneath the ceramic pot to guard flooring.
Get the look
- Ceramic cylinder plant pot
- Raised wood plant stand
- Tall potted indoor ficus or palm
- Moisture-catching ceramic drip tray
How to style it
- Identify an underutilized corner near an indirect window light source.
- Set the potted plant into a sturdy ceramic container with drainage protection.
- Raise the pot on a low wooden stand to give the foliage extra vertical presence.
5. Drape a textured waffle throw blanket
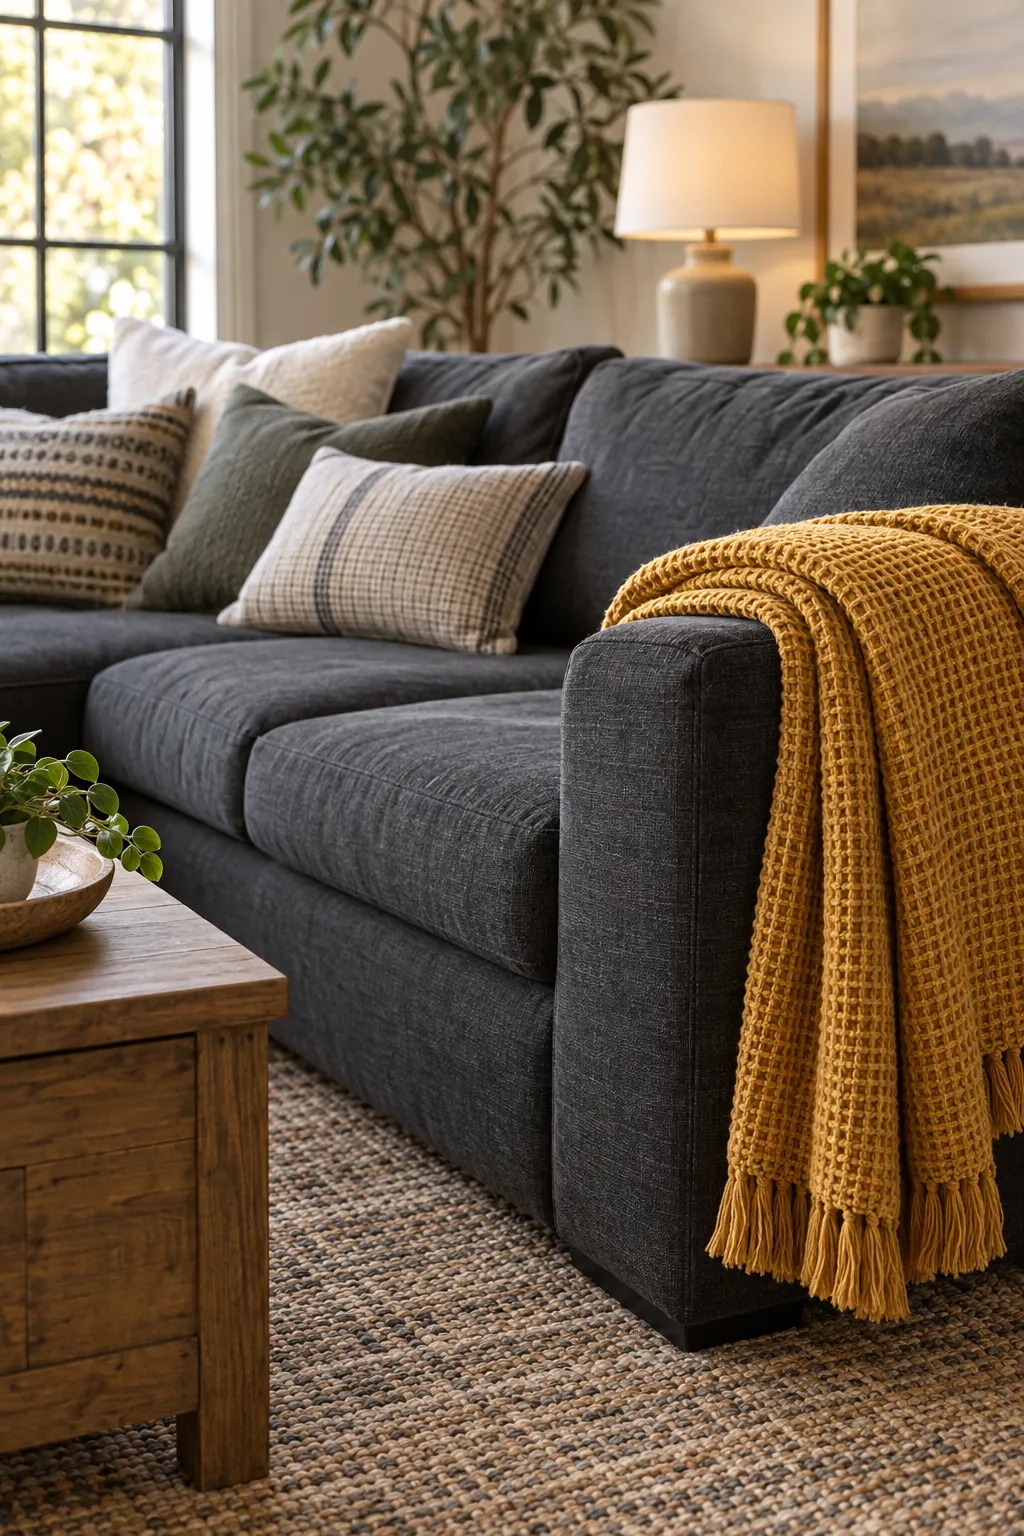
A cozy blanket adds instant warmth and breaks up broad expanses of solid upholstery fabric. Choosing a chunky knit or waffle weave introduces tactile contrast against smooth leather or flat-woven sofas. Fold the blanket lengthwise and drape it cleanly over an armrest or tuck it casually into a nearby floor basket.
Get the look
- Cotton waffle weave blanket
- Open wire or woven floor basket
- Chunky fringed cotton throw
How to style it
- Fold the blanket into thirds lengthwise to create a neat fabric runner.
- Drape it smoothly across the arm of your sofa or the corner of the chaise.
- Smooth out deep creases while allowing the fringe to hang naturally along the side.
6. Arrange pillar candles on stone
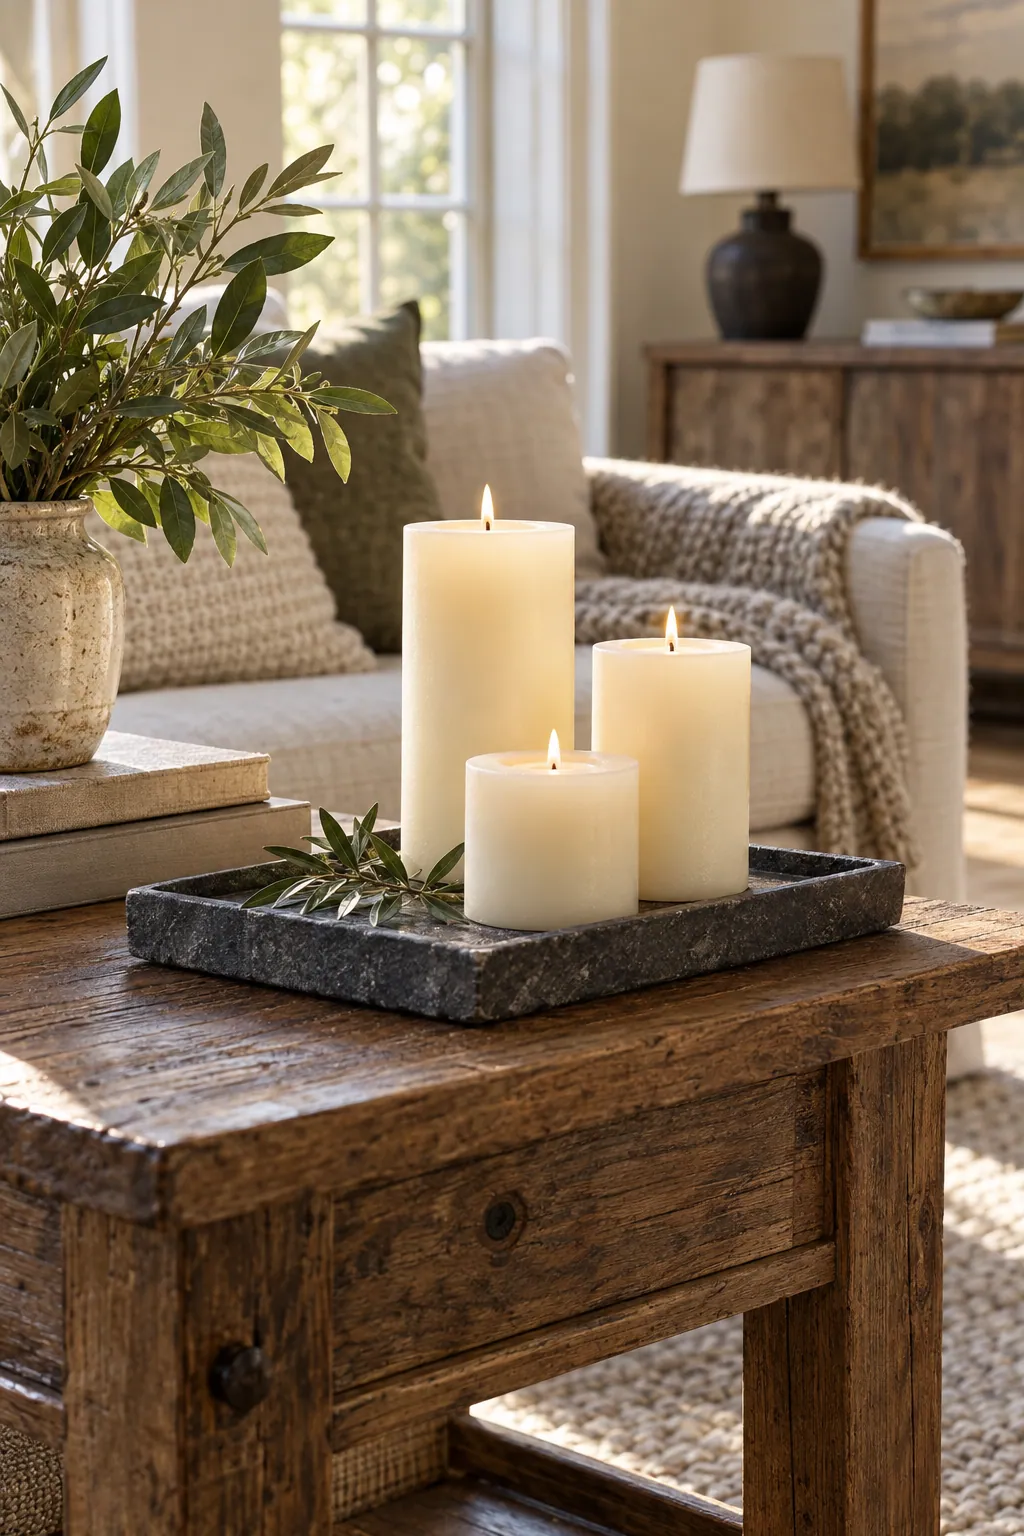
Grouping candles together creates a calm focal point that adds ambient warmth to dim evenings. Varying the candle heights creates rhythm, while a stone or ceramic platter keeps melted wax off finished wood. Stick to unscented wax in common seating areas so the atmosphere remains pleasant during gatherings or quiet reading time.
Get the look
- Unscented ivory pillar candles in three heights
- Natural slate or marble serving tray
- Brass wick trimmer
How to style it
- Place a flat stone platter on an end table or low console surface.
- Cluster three pillar candles of staggered heights tightly together near the center.
- Trim all wicks to a quarter inch before lighting for a steady, smoke-free flame.
7. Mount an oversized round wall mirror
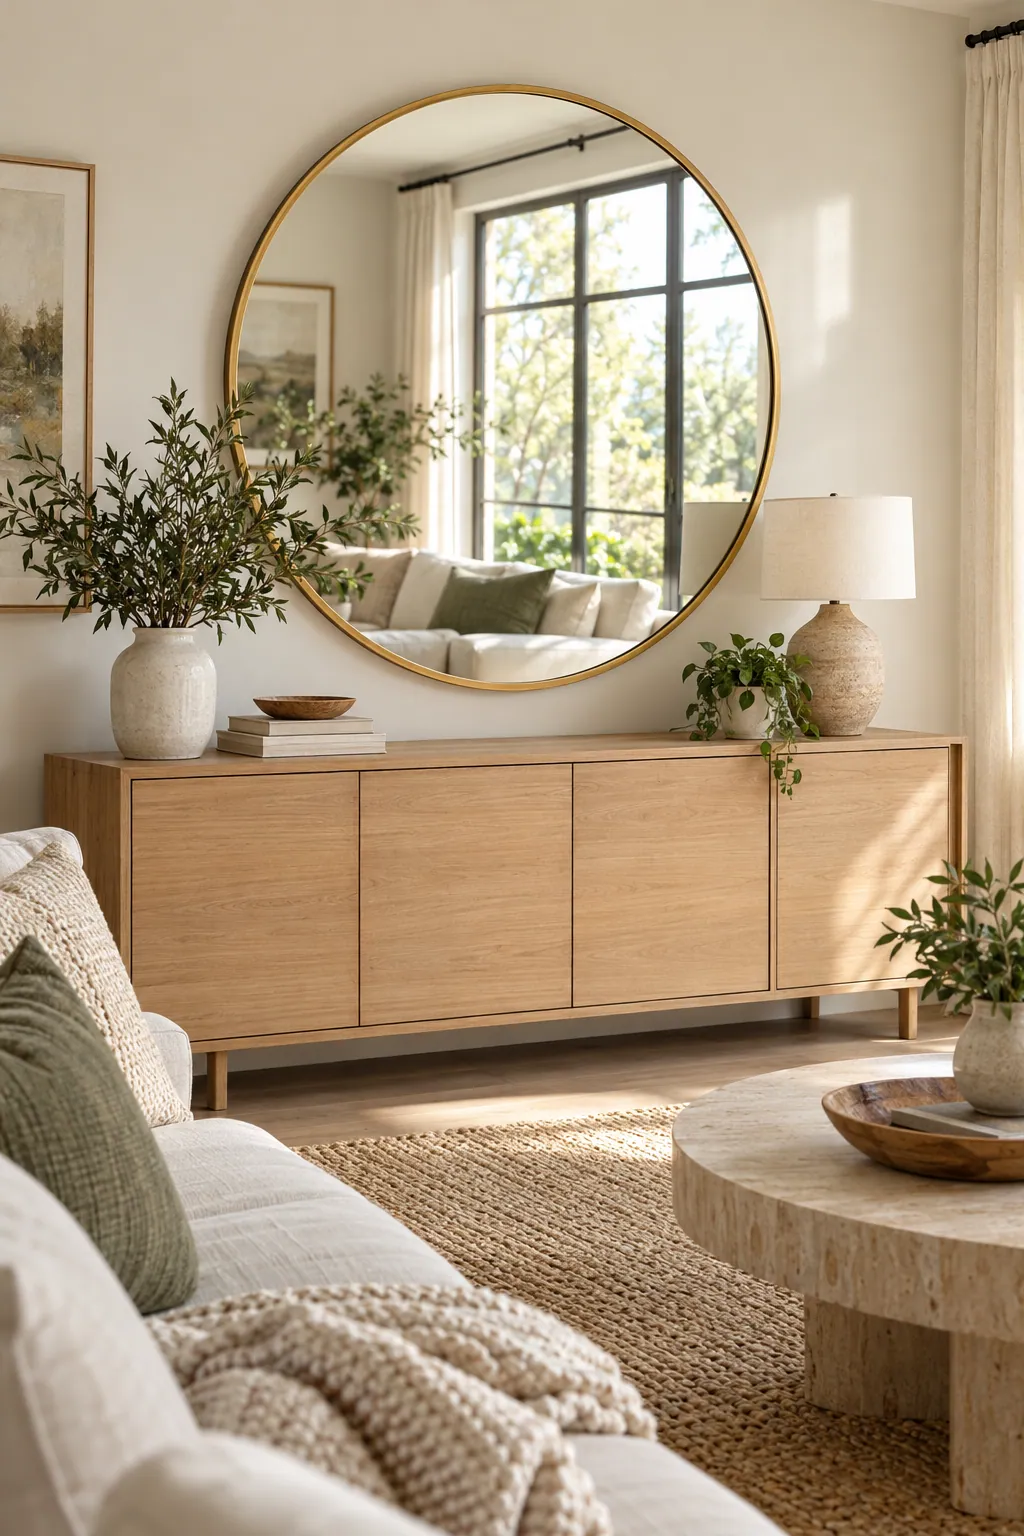
Mirrors reflect daylight deeper into interior spaces and make compact rooms appear twice as large. A round silhouette balances straight furniture lines like long sofas and rectangular media consoles. Position the center of the mirror roughly eye level, ideally across from a window to capture the best natural outdoor views.
Get the look
- Thirty-inch round brass-framed mirror
- Heavy-duty drywall anchors
- Picture hanging wire kit
How to style it
- Locate a wall space opposite or adjacent to your main living room window.
- Mark the mounting height so the center of the mirror sits roughly sixty inches from the floor.
- Secure appropriate anchors into the wall studs and hang the mirror firmly in place.
8. Set up layered warm accent lighting
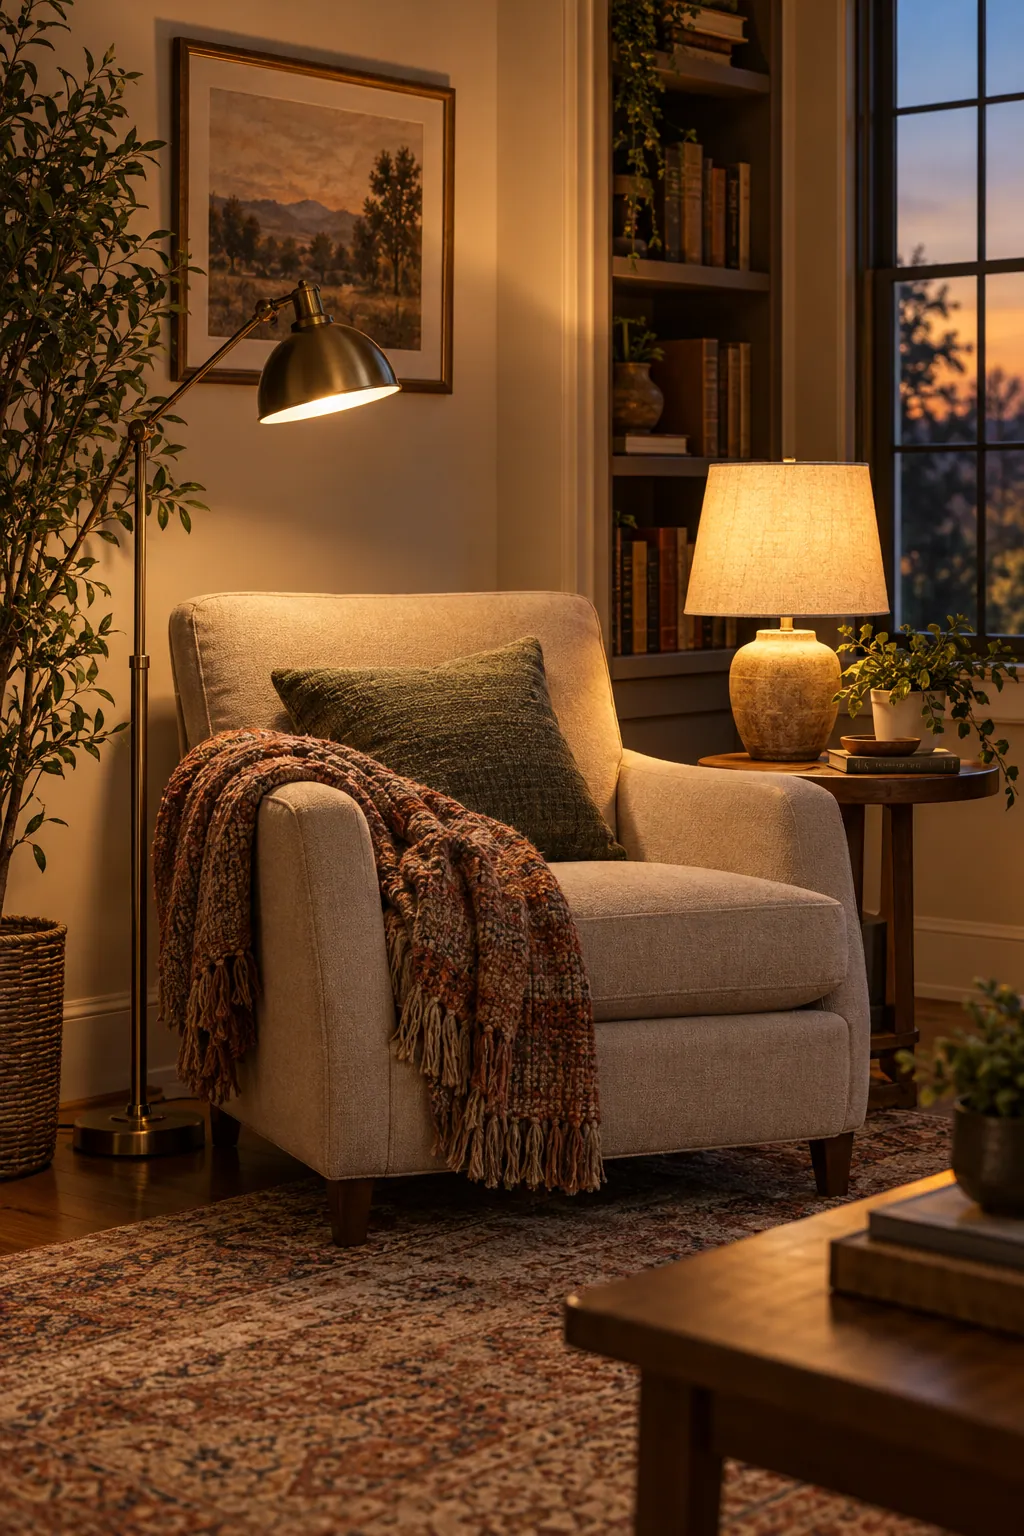
Overhead lighting can feel harsh and uninviting once the sun sets. Placing lamps at varying heights around the perimeter creates pools of gentle illumination that make the space feel calm and relaxing. Choose warm white LED bulbs with low kelvin ratings to keep the glow soft rather than stark and clinical.
Get the look
- Slender brass floor lamp
- Textured ceramic table lamp
- Warm white 2700K LED bulbs
- Linen drum lamp shades
How to style it
- Place a tall reading floor lamp just behind or beside your primary sofa.
- Position a shorter ceramic table lamp across the room on a low credenza or side table.
- Switch off central overhead fixtures and illuminate the space using only the paired accent lamps.
9. Hang an asymmetric framed art display
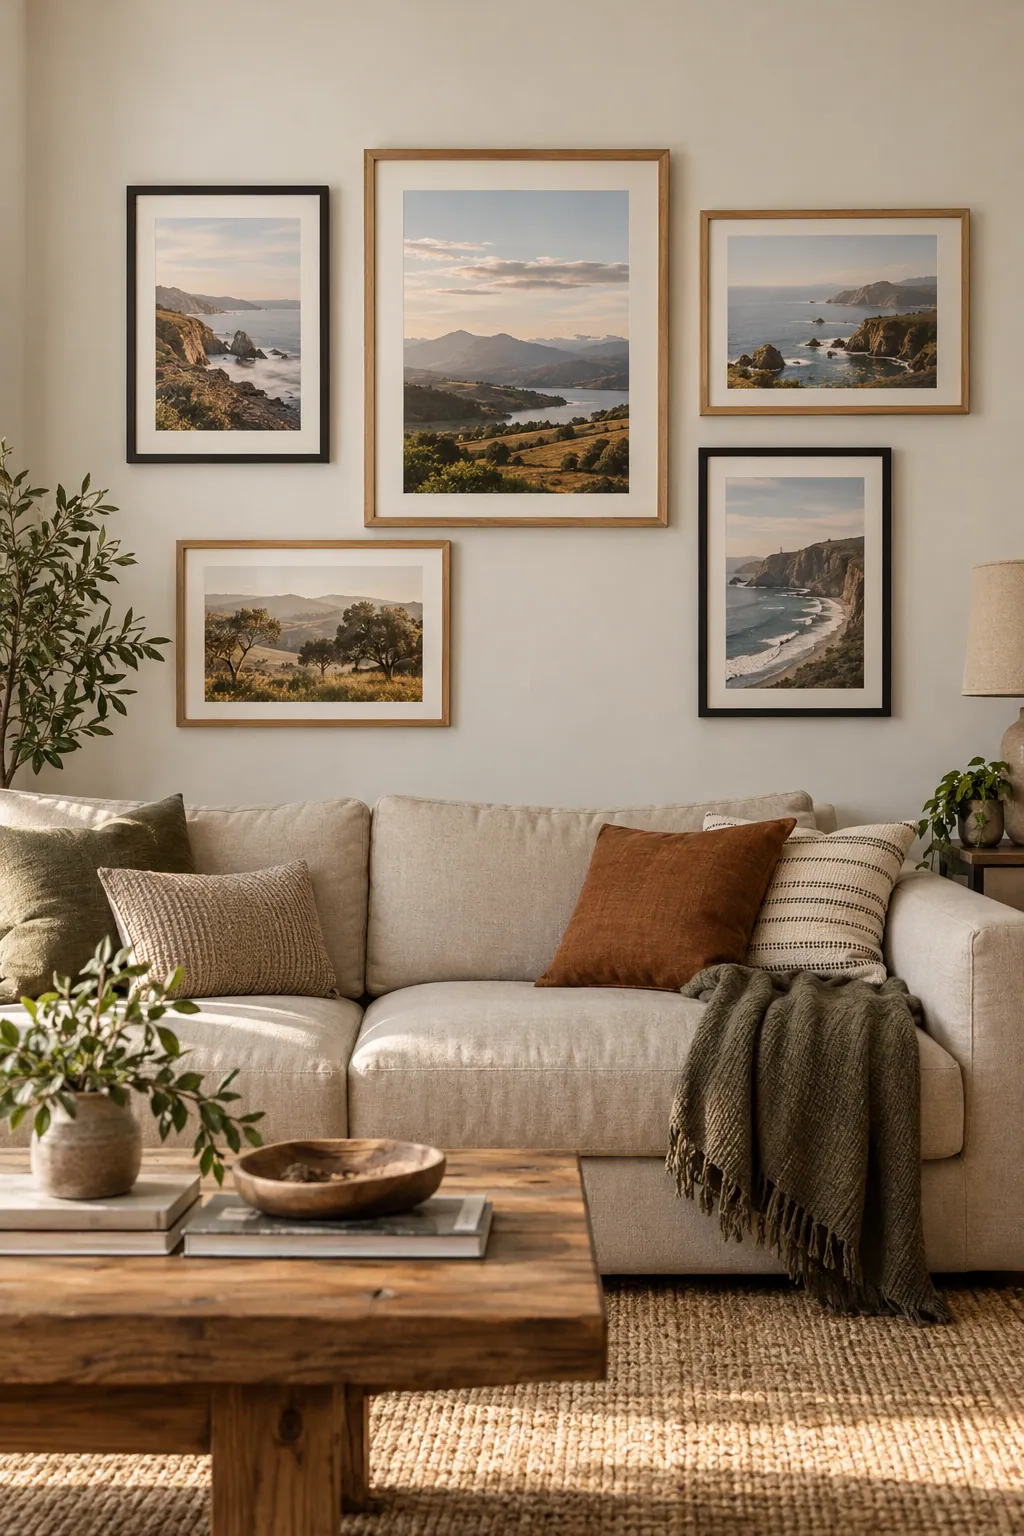
Blank walls often leave a room feeling incomplete and cold. Assembling an asymmetric grouping of prints in coordinated frames adds personality without requiring expensive custom artwork. Lay out your frames on the floor beforehand to balance visual weight, maintaining consistent two-inch gaps between each frame on the wall.
Get the look
- Assorted wood and metal picture frames
- Matte photo paper prints
- Picture hanging strips
- Laser level
How to style it
- Arrange your framed prints on the floor until the balance of colors and sizes feels pleasing.
- Start mounting on the wall with the largest central frame at eye level.
- Add surrounding smaller frames, keeping an even two-inch distance between edges.
10. Upgrade media console drawer hardware
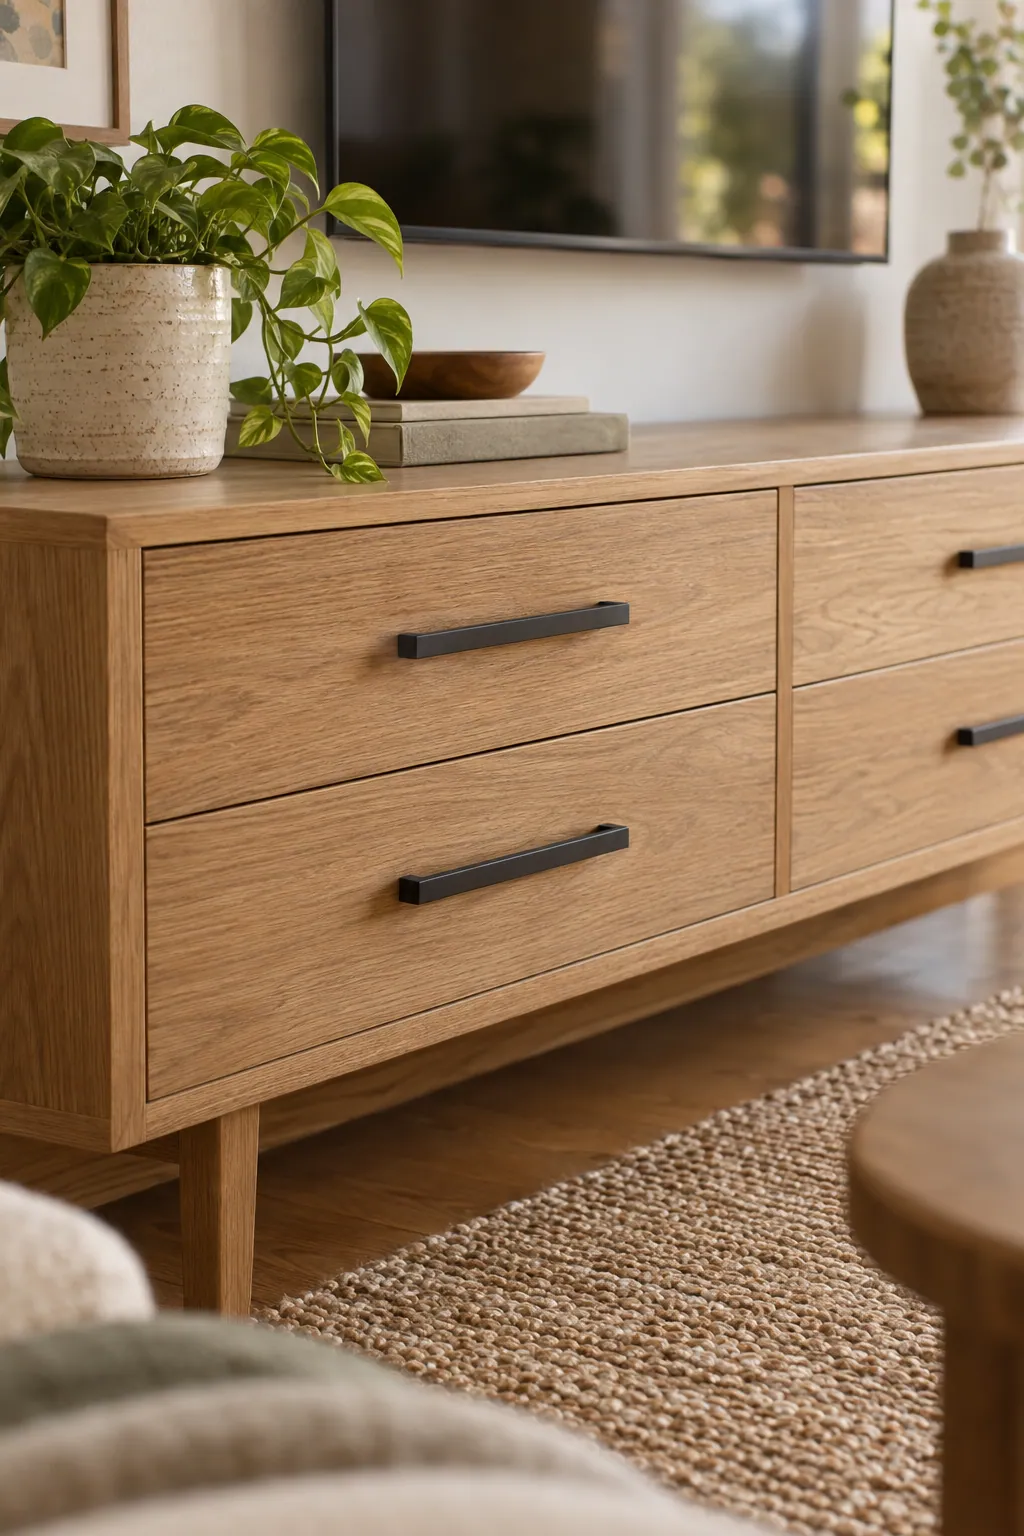
Standard factory knobs on media cabinets and storage sideboards often look generic and utilitarian. Replacing them with brushed metal or matte black pulls provides an instant visual lift for very little money. Measure the hole spacing accurately before purchasing replacements to avoid drilling new holes into your existing cabinet doors.
Get the look
- Matte black bar pulls
- Brushed brass cabinet knobs
- Handheld screwdriver
How to style it
- Unscrew and remove the original hardware from your cabinet doors and drawers.
- Clean any accumulated dust or grime from around the mounting holes.
- Fasten the new pulls securely using the included mounting screws.
11. Lay down a large textured rug
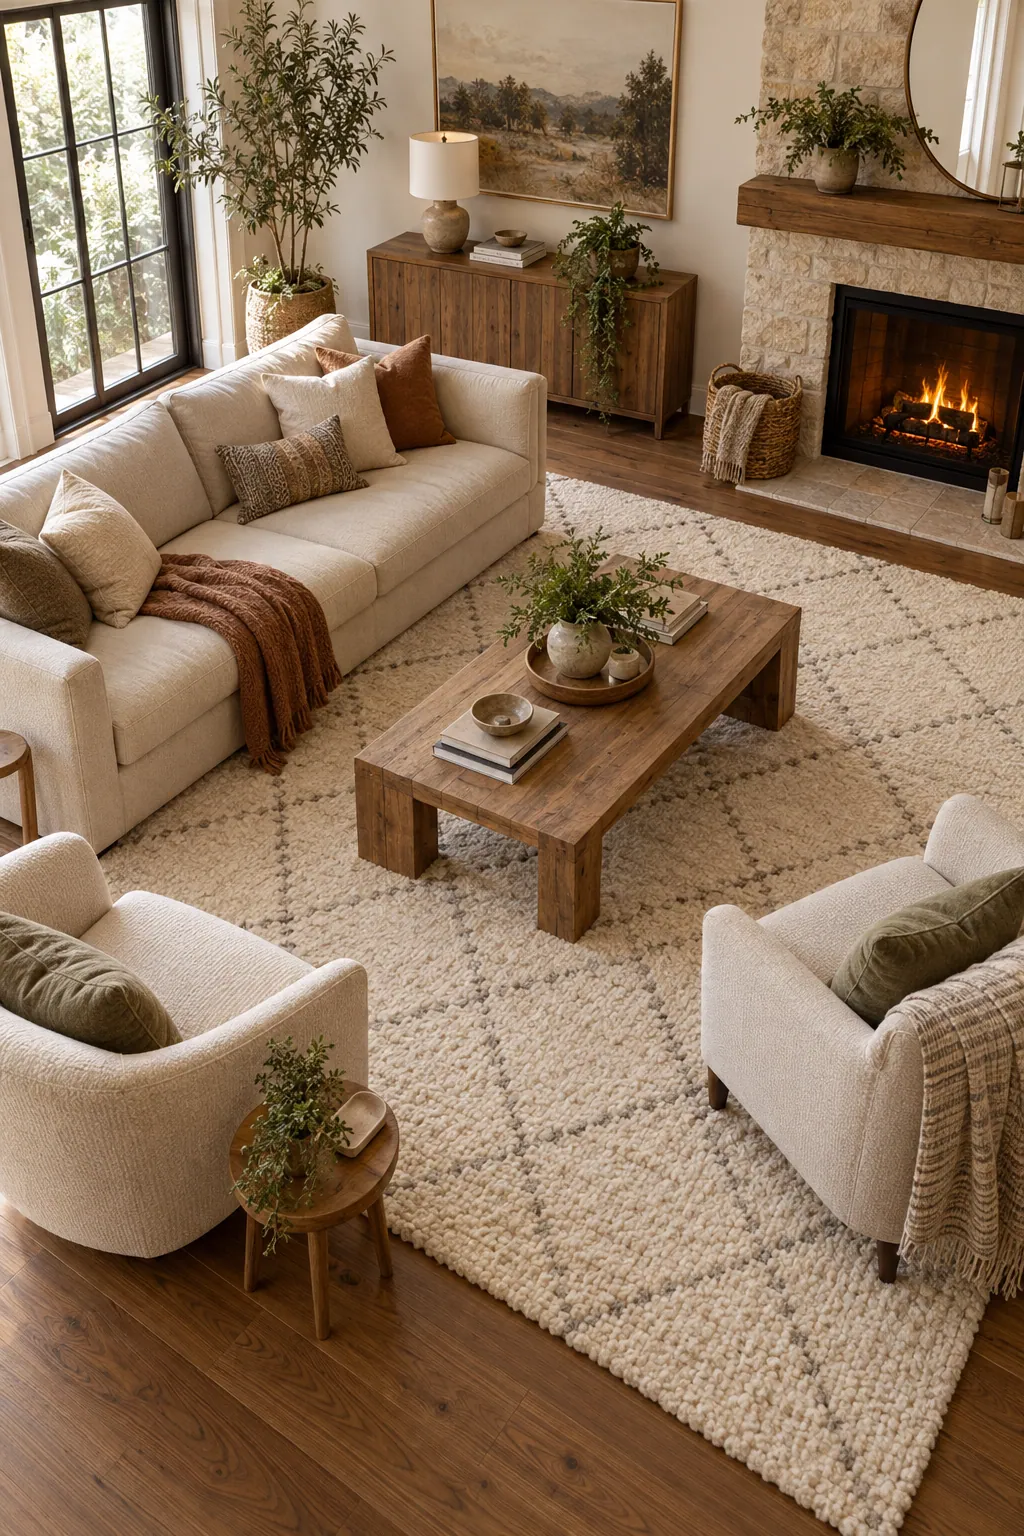
An undersized rug makes a sitting room feel disjointed and cramped. A generous area rug that extends under the front legs of all major seating anchors the arrangement into one cohesive zone. Opt for flatweaves or low-pile wool blends that resist daily traffic while providing softness under bare feet.
Get the look
- Eight-by-ten woven wool area rug
- Cushioned non-slip rug pad
- Furniture sliders for heavy sofas
How to style it
- Roll up and remove any old rugs, sweeping the bare flooring clean underneath.
- Center a thick non-slip rug pad in the middle of your seating arrangement.
- Unroll the new rug and place the front legs of the sofa and chairs directly over its edges.
12. Hang floor-to-ceiling linen curtain panels
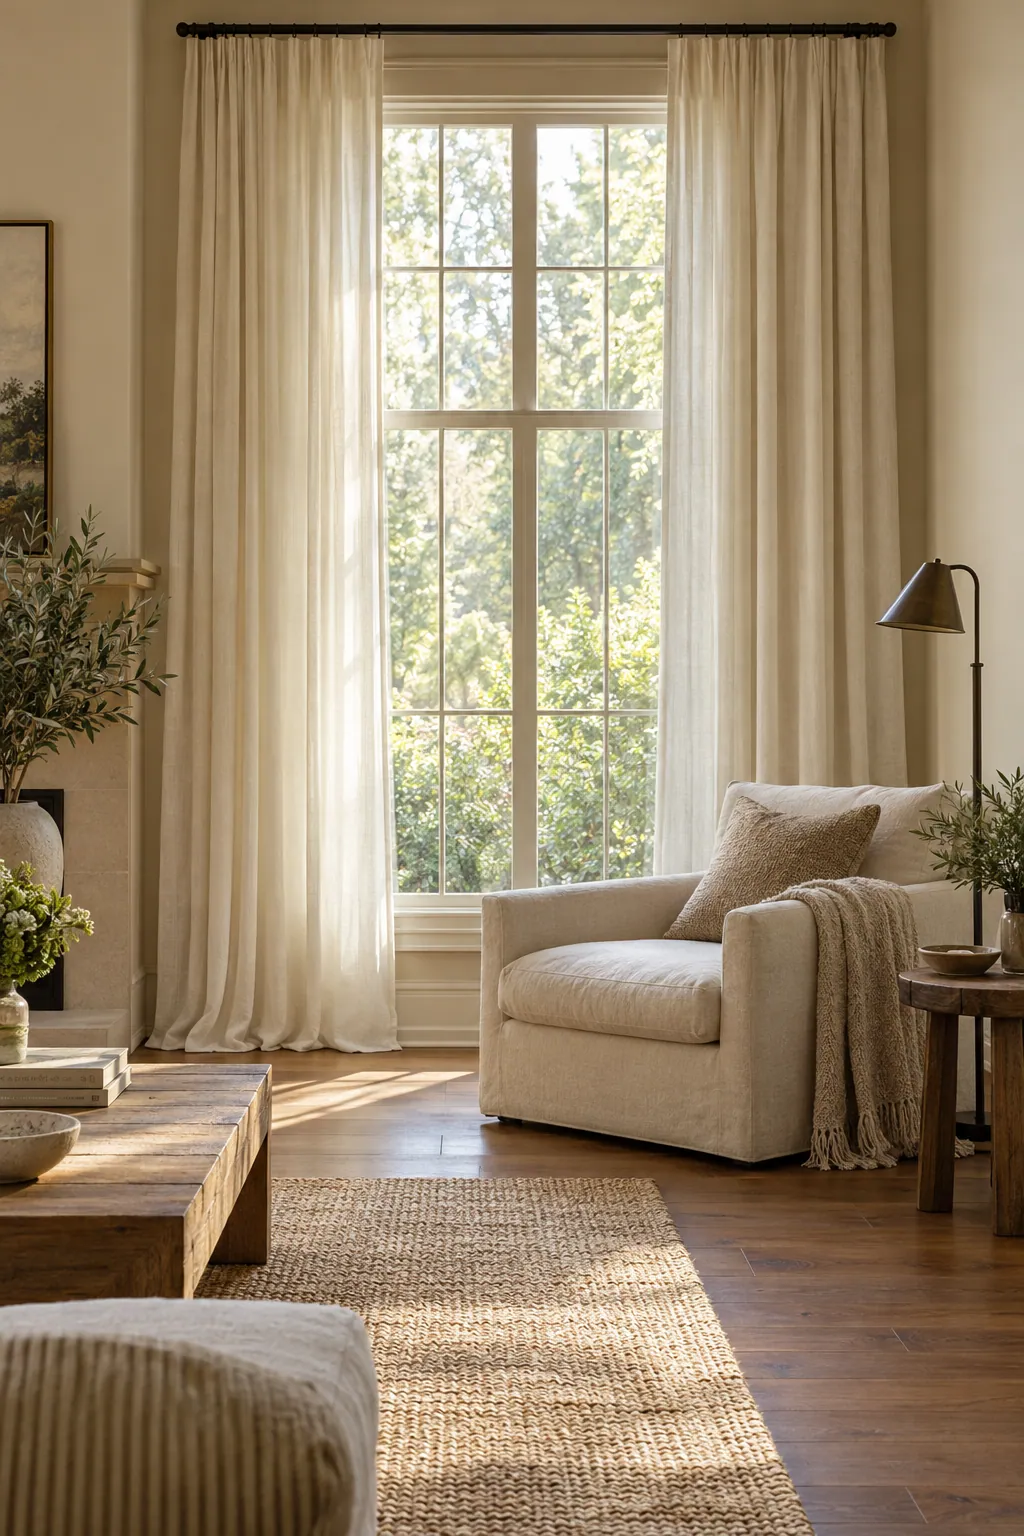
Short or flimsy drapery cuts walls in half visually and limits incoming daylight. Hanging wide linen panels high above the window frame draws the eyes toward the ceiling, creating an airy sense of volume. Use a sturdy metal rod that extends several inches past the window trim on both sides.
Get the look
- Ninety-six-inch unlined linen curtain panels
- Drapery ring clips
- Matte black metal curtain rod
How to style it
- Install the curtain rod bracket several inches above the window molding, close to the ceiling.
- Extend the rod outward past the window casing by at least six inches on each side.
- Slide the ring clips onto the rod so the curtains skim the floor when closed.
13. Paint an accent wall in sage
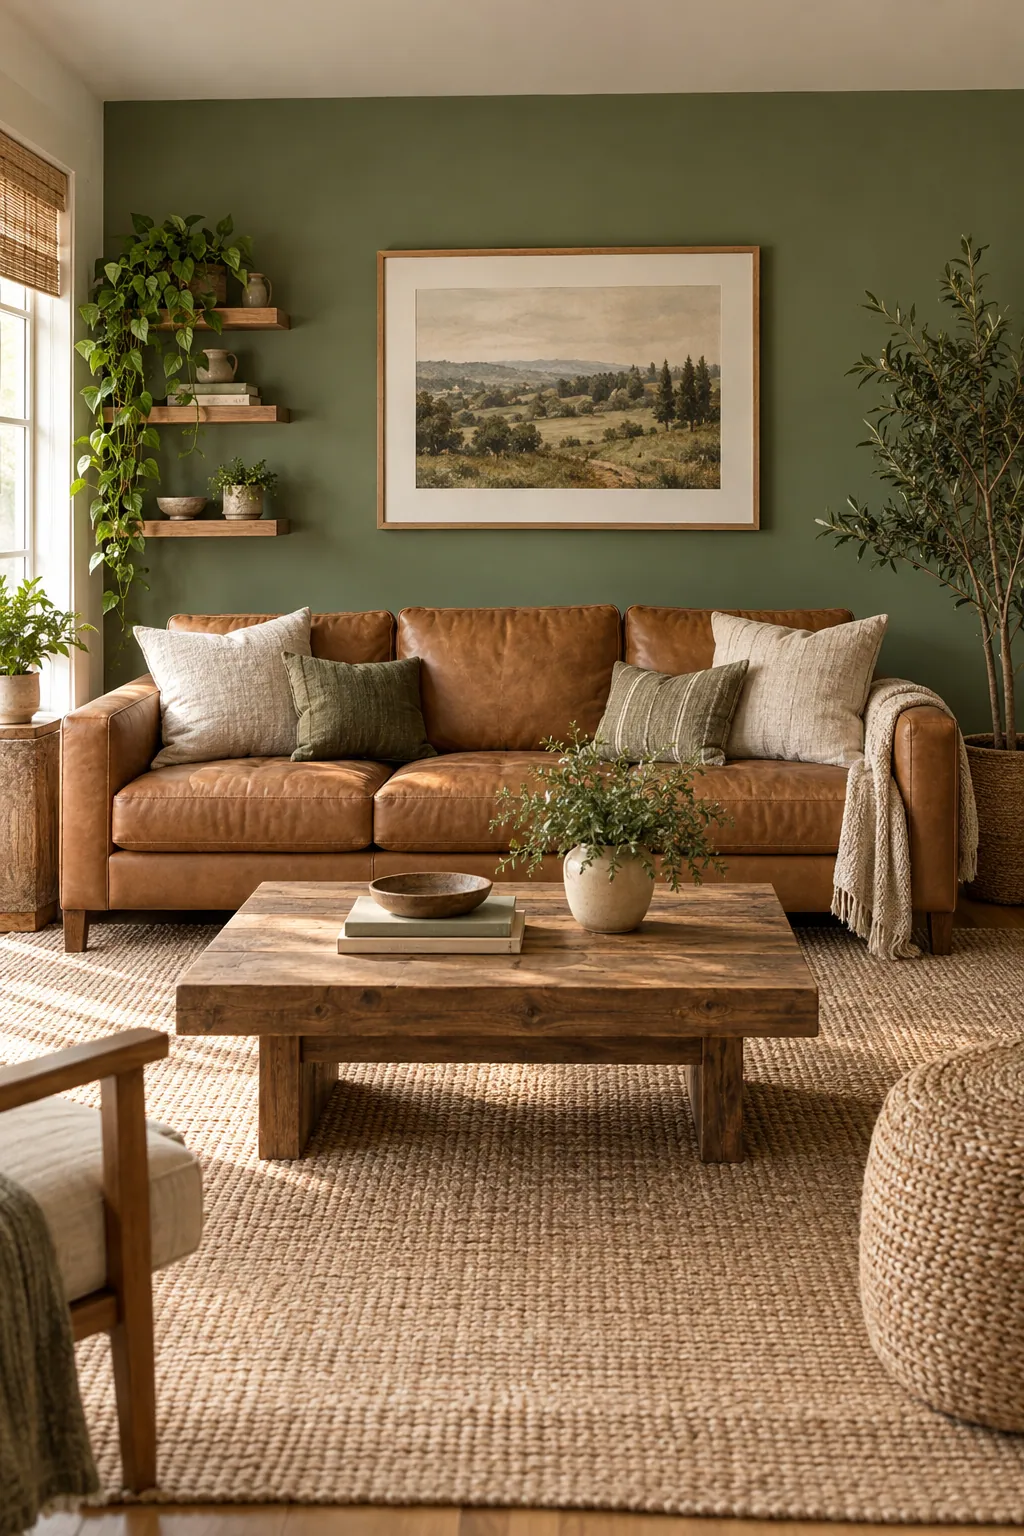
A single wall of color creates depth and focal interest without darkening the entire room. Soft sage green brings an organic, soothing feel that complements both warm wood finishes and neutral furniture pieces. Use matte or eggshell paint finishes to conceal minor drywall imperfections and avoid distracting glare from nearby lamps.
Get the look
- Muted sage green wall paint
- Painter tape
- High-density paint roller and tray
- Angled sash brush
How to style it
- Tape along baseboards, adjoining walls, and ceiling edges with clean painter tape.
- Cut in around the edges of the focal wall using an angled sash brush.
- Roll two even coats of sage paint across the center, allowing proper drying time between coats.
14. Install floating shelves above seating
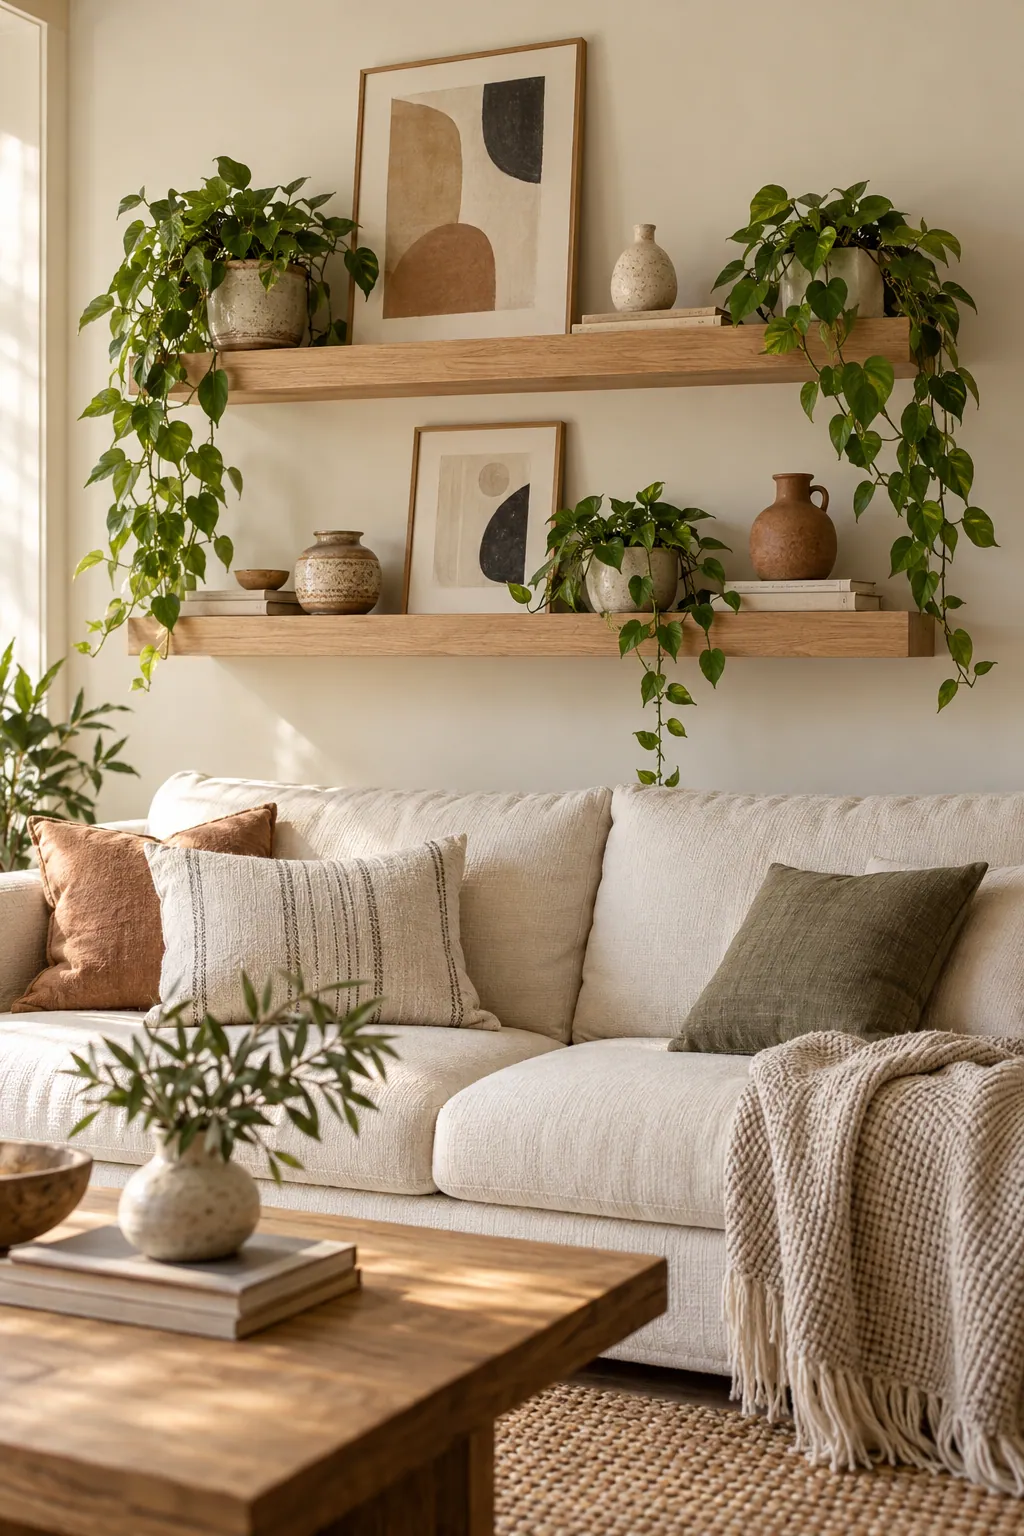
Vertical storage draws attention upward while providing a dedicated home for favorite books and small keepsakes. Floating wood ledges introduce warm texture while keeping tabletops clear of daily clutter. Anchor the brackets directly into wall studs to ensure the shelves safely support the weight of pottery and framed art pieces.
Get the look
- Solid oak floating shelves
- Concealed heavy-duty steel brackets
- Small ceramic planters
- Stud finder
How to style it
- Locate and mark the wall studs above your sofa using a stud finder.
- Level and screw the concealed shelf brackets securely into the structural studs.
- Slide the wood shelves onto the brackets and style with leaning prints and small pottery.
15. Paint trim in a contrasting tone
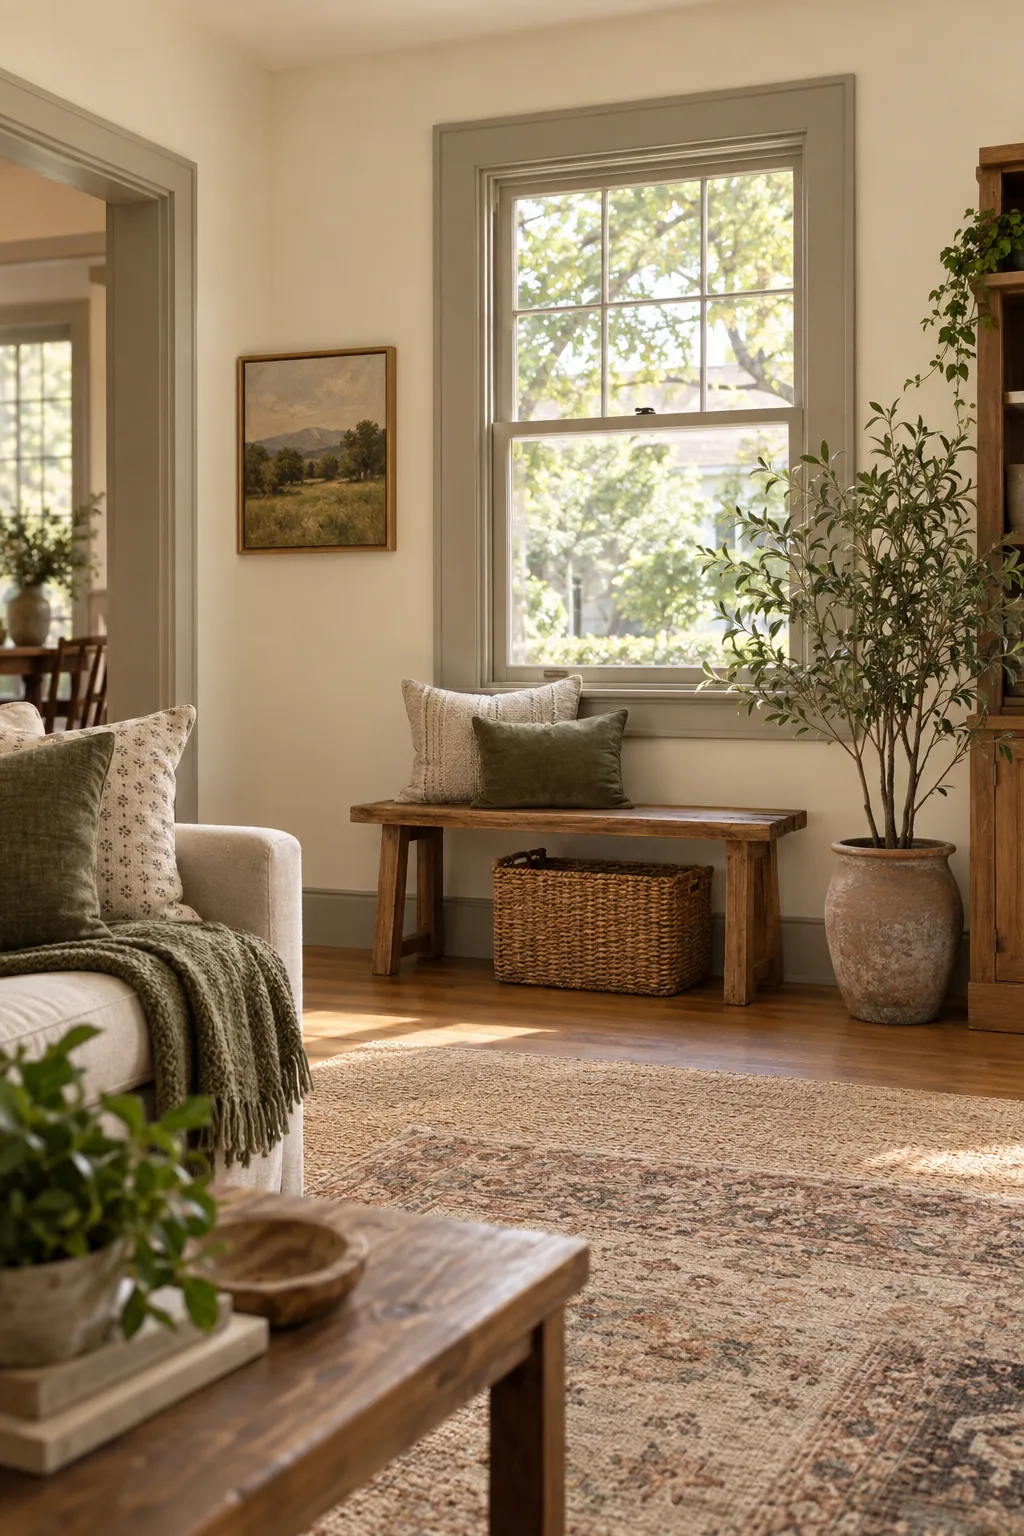
Painting baseboards and window moldings in a distinct, slightly darker shade than the walls adds tailored architectural character. This subtle contrast frames the room and makes ordinary architectural details feel custom and deliberate. Use a durable satin or semi-gloss enamel on trim pieces so they withstand vacuum scuffs and daily wear.
Get the look
- Semi-gloss enamel paint in warm greige
- Precision edge painter tape
- Two-inch angled synthetic trim brush
- Fine grit sanding sponge
How to style it
- Lightly scuff sand existing baseboards and window casings to help new paint adhere.
- Apply precision painter tape along the wall drywall just above the trim edge.
- Brush on two thin coats of contrasting semi-gloss enamel, smoothing out brush strokes as you go.
Make it yours
Refreshing your living room does not require a complete overhaul or weeks of messy disruption. Starting with just one small update, such as swapping pillow covers or moving a lamp, creates immediate momentum. Choose the single project that best matches your available time this weekend, and enjoy watching your shared living space feel renewed and comfortable.
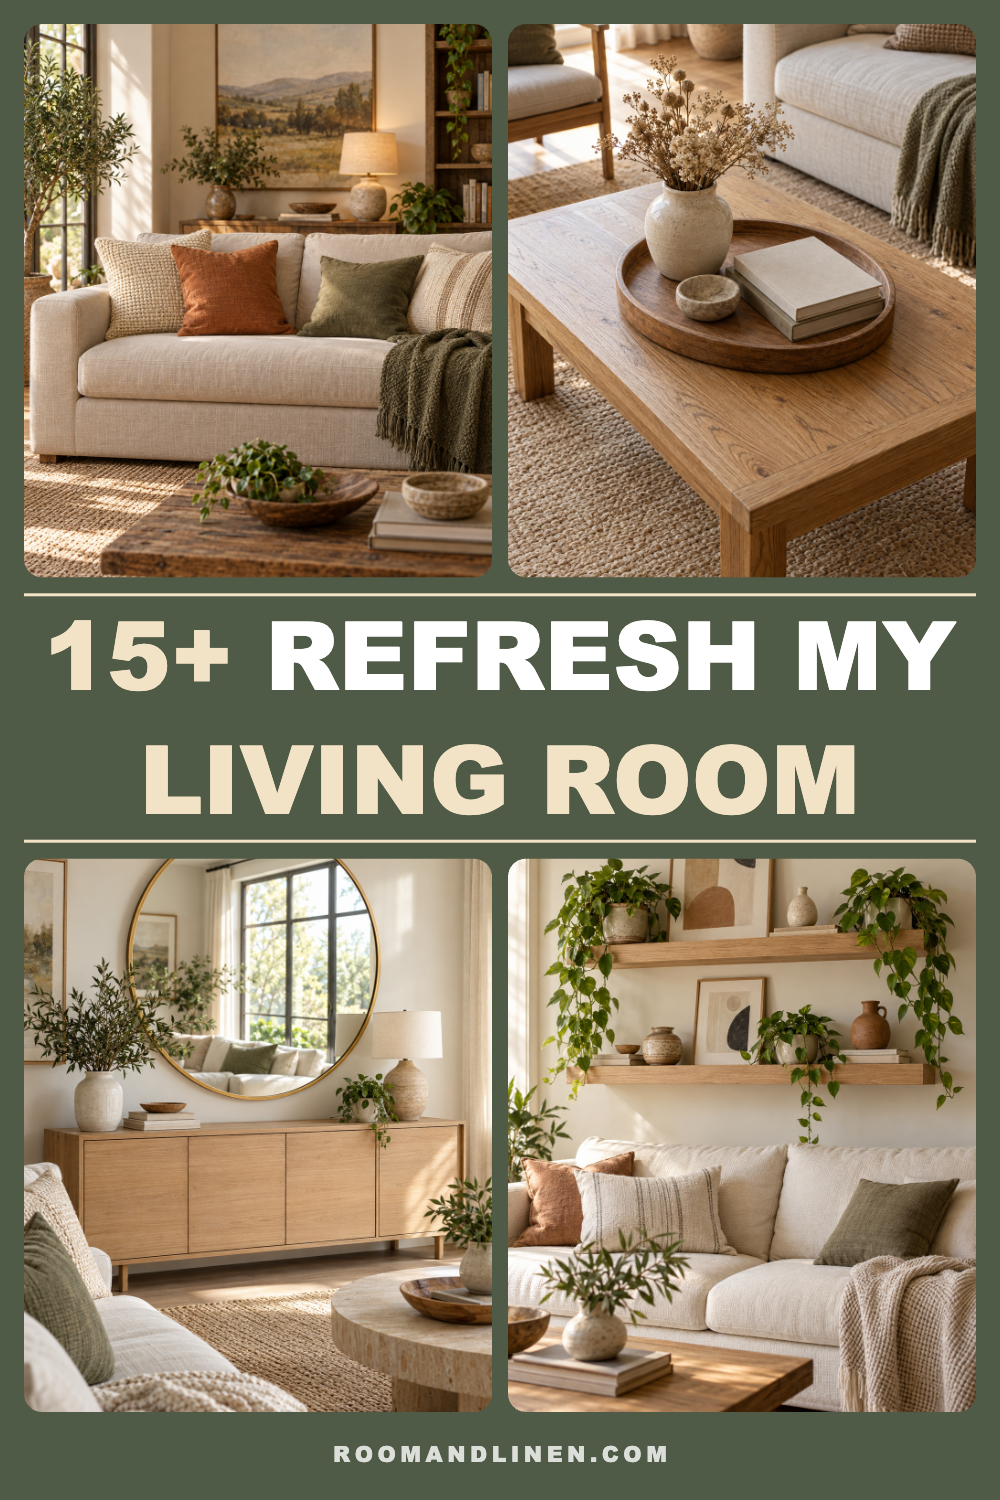
Save these ideas for later
Pin this list to your refresh my living room board so it is there when you are ready to start.
Save to Pinterest